There are many wonderful blogs out there. I am honored that you are reading mine!

Friday, December 30, 2011

Clams Casino

This post is dedicated to my aunt Janice and uncle Tommy. Janice taught me so much about being a hostess and a home chef. To me, a home chef creates classy meals whether it's simple meat loaf and mashed or a five course meal. Janice oozed style and grace all while having a great time. In a nutshell she knew how to throw a party for 50 or 2, and she put the same effort into both. If you were lucky enough to be at Janice and Tommy's for a party you knew you were about to experience something very special. Cheers to my favorite aunt and uncle! I love you!
 Recipe tip: I save bread throughout the year, put it in the food processor and store the crumbs in the freezer until I need them for recipes like this. I usually don't even need to thaw them although I think you could. Some of my favorite crumbs come from bread I make in the bread maker using Pamela's Bread Mix. This recipe can easily be doubled.

Clams Casino
6 1/2 oz can minced clams
1/4 stick butter
1/2 cup dried bread crumbs (see recipe tip)
4 slices crisply cooked bacon, crumbled
1/4 cup minced onion
1 Tbs parsley flakes, crumbled
1 Tbs Parmesan cheese
1/2 Tbs Old Bay
1/2 Tbs lemon juice
1 tsp oregano
1/4 tsp garlic powder
Paprika, sprinkle

1. Drain clams, reserve liquid.
2. Melt butter and add to clams. 
3. Add all other ingredients and mix. 
4. Add clam juice until all is moist. You may not need all of it. 
5. If you have clean clam shells fill them each with the mixture and top with more Parmesan cheese and a sprinkle of Paprika. If you do not have clam shells spay a mini cupcake pan with cooking spray, place a small amount of clam mixture in the palm of your hand, shape into a ball and place into the cupcake pan and bake as usual.
6. Bake in a pre-heated 400 degree oven until hot about 15-20 minutes.
Enjoy!

Coming Home

New Year's Eve is my favorite day of the year. For me, it is the quintessential holiday. The main focus is to have a good time with those you love. It just doesn't get much better! Speaking of things you love, I love blogging, but have not made one post until today since September. This is in part to taking a job I was offered through my Church. Being a wife and mother has been the most wonderful and fulfilling experience of my life. Since beginning working for my Diocese I now have added an experience that feels like I am coming home every time I step into my office.

I certainly wish I had been able to post along side working and keeping up with my domestic affairs, but alas I could not. Moving forward I do hope to maintain this hobby as well as juggle other duties successfully. My goal is and always has been to blog recipes and current events pertaining to living gluten free. My desire is to have a place my children can go and look up all of the recipes they grew up with. Recipes collected from talented chefs from around the world and even a few from yours truly. While this collection develops I earnestly hope that readers of this blog find something to enhance their lifestyle whether you must eat gluten free or not.

Peace and Happiness in the New Year and Always!  Happy 2012!!!

Quick Cuke Canapes: Gluten Free Naturally

There is just something really special to me about preparing something elegant yet SUPER easy that is created from naturally gluten free ingredients. These canapes fit that description. Perfect for your New Years's Eve celebration or anytime. Enjoy!

2 medium cucumbers (I use seedless English cukes)
1 (3oz.) pkg. cream cheese , softened
2 Tbs finely chopped fresh parsley
2 Tbs finely chopped chives
1 Tbs sour cream or mayonaisse
1 tsp prepared horseradish
1/2 tsp lemon juice
1/2 cup finely chopped cooked shrimp

Makes 36 canapes
Original source unknown

1. Draw tines of fork lengthwise through cucumber peel to score; cut into 1/4 inch thick slices. Place on paper towels to drain.
2. In a small bowl, combine sour cream, horseradish, and lemon juice; beat until smooth. Stir in shrimp.
3. Spread or pipe 1 tsp mixture onto each cucumber slice. Garnish as desired.
4. Serve immediately or refrigerate up to 2 hours.

Saturday, September 3, 2011

An Appealing Poll Question

It has been a long time since Gluten Free and You posted a poll question. I remedied this, this afternoon. The new question is, What Sounds Most Appealing to YOU? Your choices are Meat Lovers Recipes,Veggies Only Please, I'll Pass on the Dairy, and I'm Watching My Weight. The most popular answer or "Readers Choice", as I like to call it will inspire a series of recipes just as polls have in the past. I hope you enjoy this new poll question. The poll closes on September 17, 2011, at  12:00am. The poll is located in the upper right hand corner of the home page.

Friday, August 12, 2011

Meal Planner

Announcing a new feature called Meal Planner! Sometimes I am at a loss for what to make for dinner. When I create a meal plan for a week or more I find dinners come together a lot easier. The Meal Planner will be found early in a post and listed in bold print. It will usually include a main dish and two sides.

When creating a grocery list you may find glancing at the Meal Planner tab useful. There is only one meal suggestion there so far, but I will be adding to it so check back. Feel free to comment about this new feature and let me know what you think.  After all,  it wouldn't be Gluten Free and You without YOU!

Southwestern Grilled Pork Tenderloin

How wonderful is it when at noon you have no idea what to make for dinner and somehow a frozen solid pork tenderloin miraculously turns into a fantastic meal with a click of the mouse? After a brief search online that is exactly what happened to me earlier this week. I found this recipe in a Google search.  I hope you enjoy it.

Meal Planner: Southwestern Grilled Tenderloin, Corn Fritters, and Coleslaw

1 Tbsp. Chili Powder
1 1/2 tsp. sugar
1 Tbsp. Freshly Ground Pepper
1 tsp. Salt
1/4 tsp. Onion Powder
1/8 tsp. Garlic Powder
1/8 tsp. Cumin
1/8 tsp. Cayenne
1 (1.25lb.) Pork Tenderloin (trimmed)
1 tsp. Canola Oil
To make the rub, combine all ingredients 
except the pork and oil in a small bowl.  
Place the pork and oil in a zip-close plastic 
bag and add the rub.  Squeeze out the air and 
seal the bag; turn to coat the meat.  
Refrigerate at least 1 hour or up to 24 hours.

Meanwhile, spray the grill rack with non-stick spray; 
preheat the grill to high or prepare a hot fire.

Place the pork on the grill rack.  Grill turning, 
until an instant-read thermometer inserted in the 
center registers 160°F for medium, (18-22 minutes).  
Transfer the pork to a platter and cover loosely 
with foil; let stand approx. 10 minutes.  Cut into 
12 slices.  (Serving = about 3 slices)


Thursday, August 11, 2011

Gluten Free and You Fun Facts

While checking the stats available through Blogger I thought it was "post-worthy" to mention that Gluten Free and You, the blogspot has had over 2,000 pageviews in its short lifetime. Currently Quinoa Egg Salad is the most viewed post. It was also the first post to top 100 views. I believe that is partly thanks to participating in  The Gluten Free Homemaker's  Gluten Free Wednesdays. I hope you enjoy these fun facts as much as I enjoy this blogspot!!! Happy reading!

Saturday, July 16, 2011

Divine Chicken and Rice


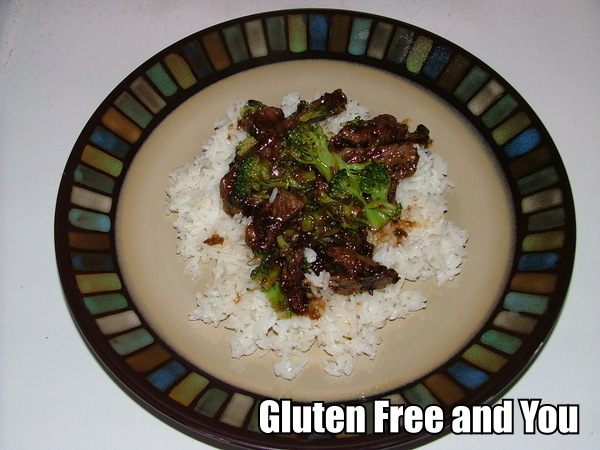
Let me introduce you to a chicken and rice recipe that just might make you throw out your old recipe card. This recipe is so delicious it could only be called "Divine".  My recipe closely follows one I found on Simply Recipes . I really think you are going to enjoy the small changes I have made.

Divine Chicken and Rice 
2-2 1/2lbs.
Salt and Pepper
Olive oil
1 medium onion, chopped
2 cloves garlic, minced
2 large portobello mushroom caps
1/4 cup dry white wine
1 1/3 chicken stock
1/2 cup sour cream
1/4 cup cream
1 cup raw medium or long grain white rice
1 1/2 tsp. salt
1 1/2 tsp. herbs de provence
1/2 tsp. paprika
1 Tbsp. dried parsley

1 Preheat oven to 375°F. Heat 2 Tbsp of olive oil in a large sauté pan on medium high or high heat (hot enough to brown but not burn). Sprinkle a dash of salt on the bottom of the pan. Season the chicken pieces all over with salt and pepper. Working in batches, brown the chicken pieces on two sides, about 1-2 minutes per batch. Add a little more salt to the pan (and more olive oil if needed) after every batch. This will help prevent the chicken from sticking to the pan. Remove chicken pieces and set aside in a bowl. Note that the chicken does not have to be cooked through, only browned.


2 In the same sauté pan add 1 Tbsp olive oil, lower the heat to medium, add the onions, and cook until translucent, about 3 minutes. Add the garlic, cook 30 seconds more. Remove onions and garlic to a shallow (9 x 13 x 2) casserole dish.


3 Raise heat to medium high, add the sliced mushrooms. Dry sauté them (no need to add butter or oil), allowing the mushrooms to brown lightly, and release some of their moisture. Add the mushrooms to the casserole dish.


4 Add 1/4 cup dry white wine to the pan to deglaze the pan, scraping off the browned bits from the bottom of the pan.  Let the wine reduce to about 1 Tbsp, then add the chicken stock, and remove from heat.
Stir in 1 1/2 teaspoon salt, the cream, and the sour cream. Add the raw rice to the casserole dish. Then pour the stock, wine, cream, sour cream mixture over the rice. Add the herbs de provence and paprika to the dish. Stir the rice, onion, mushroom, herb mixture so that they are evenly distributed in the casserole dish.

5 Place the chicken pieces on top of the rice mixture (in a single layer if you can, they will be crowded). Cover the casserole dish tightly with aluminum foil. Bake in a 375°F oven for 45 minutes. Remove foil. If the casserole is still too liquidy, let it cook a few minutes more, uncovered, until the excess liquid has evaporated away.
Sprinkle with parsley before serving.
Serves 6 (with leftovers)
adapted from Simply Recipes Chicken and Rice Casserole

I must admit I have even eaten this dish cold from the fridge. It's that good! Enjoy!

Friday, July 1, 2011

Gluten Free and You Digest: June 2011

The Gluten Free and You Digest is a post in which I like to wrap up the month's events in a neat little package. Of course there are so many headlines bursting about gluten free awareness I will not get them all. That's where you come in. If you dear reader saw an article recently that you believe is noteworthy I invite you to comment about it in the comment section below this post.

I was diagnosed 3 years ago in June. If you have been diagnosed and really don't know which way to turn for help there are some really great resources. Through the University of Chicago you can not only get information about celiac disease but also by meeting certain criteria you can get a Gluten Free Care Package.

The National Digestive Disease Information Clearinghouse website is another source that is very user friendly and very informative. I recommended this website to my son's elementary school administration when he was diagnosed.

I am pleased to post that the prestigious Philadelphia Award was given to Alice Bast, Founder of the National Foundation for Celiac Awareness  (NFCA) for her dedication to raising celiac awareness. Gluten Free and You would like to congratulate Ms. Bast on her award and thank her and the staff of the NFCA for their commitment to raising funds for research, education and screening.
Bast will be given the award, along with the $25,000 prize that comes with it, on May 17th, 2011. source: The Gluten Free Bulletin
 The following is the Mission and Vision Statements from the National Foundation for Celiac Awareness

Mission:

To be the leading organization in raising awareness for celiac disease and gluten intolerance that will facilitate research, education and early diagnosis, and improve the quality of life for children and adults affected by this autoimmune disease.

Vision:

We envision a world in which:
  • Celiac disease is widely recognized as one of the most common hereditary diseases.
  • Better, more accurate, and cost-effective screening methodologies are available and in use.
  • A pharmaceutical cure is in place to prevent the onset or mitigate the effects of this autoimmune disorder so that men and women suffering from celiac disease and dermatitis herpetiformis can lead a normal life

 One last current event to share is that Sarah Jane Smith, one of the the NFCA's Celiac Disease Athletes for Awareness played this past weekend in the LPGA Championship presented by Wegmans in Rochester, NY. According to the  LPGA Season Overview, Sarah has had seven starts and one top ten finish. Congratulations Sarah!

"I changed my diet because Celiac disease runs in my family. Earlier this spring, I stopped eating wheat or gluten. I cut out bread and pasta and it's really helped. I feel better on the course and the new diet has given me more energy. It requires a lot of planning, though. You can't just grab a sandwich when you go out on the course. Now, I eat a lot of gluten-free energy bars, fruits and nuts, and rice cakes with wheat-free peanut butter." ~Sarah Jane Smith source: Gluten Free  NYC 


    Wednesday, June 15, 2011

    Voila! A New Feature

    Flowers & Herbs
    I just added a new feature you may find useful. It's called Linkwithin. This gadget pulls other posts from the archives and features them at the bottom of each post entry. What I have found to be fun is, say you are looking for a dinner option or even a side dish and then voila at the bottom of the post you find a great dessert. You might find an article that I posted a week or a month ago that you missed but find relevant to you that day.  I hope you enjoy and take advantage of this new feature. Feel free to comment here on the blogspot, on facebook or shoot me an email to glutenfreeandyou@gmail.com and tell me what you think of this new feature or the blog itself, after all it's about Gluten Free and You!

    P.S. Did you notice the new poll question in the sidebar???

    Friday, June 10, 2011

    Gluten Free and You Delivers

    bazaardesigns.com
    I have been asked by Readers of Gluten Free and You to enable delivery of posts via email. I set this feature up a week ago, but wanted to give it a test run. After successfully receiving the most recent posts I am happy to announce that for those that wish to receive posts by email you may do so by entering your email address in the new "Follow by Email" gadget located in the sidebar courtesy of Feedburner by Blogger. As always your privacy is just that, YOURS.  The only email from GFY you will receive are new posts. Nothing will be delivered if I don't post something new.
    Another new feature is the print button at the bottom of posts. This "Print Friendly" button is most useful if you would like to print a recipe or send a recipe to a friend. I hope you like and use these new features. All I ask in return is that you give credit where credit is due.  I strive to be an honest blogger and always site my sources. I want folks out there who have worked hard at creating recipes to receive the proper respect. As a blogger it is my duty and my pleasure.  As always thank you for stopping by and come again soon.
    P.S. Reaction tabs located at the bottom of posts are a quick way to give feedback without taking time to comment, but comments are most appreciated. Bye for now :)

    Wednesday, June 8, 2011

    Quinoa Egg Salad

    Dear Reader,
    I am entering Quinoa Egg Salad in The Gluten Free Homemaker's  Monthly Challenge for June. Wish me luck on getting picked to have this recipe displayed on Linda's fabulous blog.

    Recipe Tip: I made enough for one serving, but this recipe can easily be doubled even tripled.


    1/2 cup cooked  and cooled quinoa
    1 hard boiled egg, chopped
    1 Tbsp mayonnaise
    1 tsp mustard
    salt and pepper to taste


    Combine all ingredients in a bowl and stir to desired consistency. Salt and pepper to taste, enjoy!
     Reprinted from original post dated 5/24/10.

    Monday, June 6, 2011

    GFY Goes International


    According to Blogger Stats the GFY blogspot has been visited by folks in 10 different countries.  A year ago this little blog began as a way to chronicle my families' adventure in gluten free living. I wanted to have a place to keep recipes that I teach my children so that someday they will feel comfortable in the kitchen and hopefully continue to enjoy foods they grew up with.

    Since then I have tried to include product reviews and gluten free news in the way of current events. I never dreamed people in 10 countries would visit.  I am honored that people from so many different walks of life would read something on my blog. Spreading gluten free goodness is so much fun. As always thank you for stopping by and come again soon.

    Wednesday, June 1, 2011

    Peanut Butter Banana Smoothie

    From the editors of Good Housekeeping, Redbook and Country Living, a magazine called 125 Best Blender Recipes is on newsstands now. In this magazine I found a most unexpected smoothie.  My recipe was inspired by one I found in the magazine. Enjoy!

    Peanut Butter Banana Smoothie
    servings 1


    1 ripe banana 
    1/2 cup plain yogurt
    1 teaspoon creamy peanut butter
    3 ice cubes
    In a blender combine all ingredients and blend until mixture is smooth.

    The magazine offers a tip for a thicker, colder smoothie. Use a banana that's been cut into chucks and frozen for up to a week in a sealed container.

    Tuesday, May 31, 2011

    Gluten Free and You Digest: May 2011

    The Gluten Free and You Digest is a segment of this blogspot dedicated to celiac disease awareness. By highlighting current events I hope to raise awareness as well as spotlight positive news stories in the gluten free and celiac community. 

    May is National Celiac Disease Awareness Month and I find it very fitting to renew the GFY Digest segment of the blogspot at this time. I am happy to report on the Making Tracks for Celiacs Run/Walk to benefit the Center for Celiac Research at the University of Maryland.  The total funds raised to date is $91,696. Isn't that fantastic? If you don't know about the University of Maryland Center for Celiac Research I encourage you to visit their website.

    Photo from http://www.citylifeeats.com/

    Another significant event that went on this month was called 1 in 133 This was the first Gluten Free Food Labeling Summit held in Washington, D.C. on May 4, 2011. The purpose of this summit was unmistakable. The largest gluten free cake was assembled to symbolize that clear, accurate, reliable food labeling is critical in the lives of people dependent on labeling for their health.  I would like to thank the leading members of the gluten free community, noted celiac disease researchers, and food corporations for participating in the
    summit. I participated in this effort by sending an email and signing a petition to encourage the FDA to complete food labeling standards!


    On Friday May, 27th , a Celiac Awareness Night took place at Citi Field in Flushing, NY. The National Foundation for Celiac Awareness and R.O.C.K. Long Island benefited from tickets sold through a special offer. The New York Mets hosted the Philadelphia Phillies, and most importantly, gluten-free concessions were available. In addition, Elizabeth Hasselbeck of The View and author of The G-Free Diet was honored in pre-game festivities.

    As recent as May 18, 2011,  reports show some athletes believe that a gluten free diet enhances performance. The question is, do these athletes medically require a gluten free diet or is the fad label fueling this phenomenon? Not being a physician myself  I may never know. Example one comes from The Gluten Free Society where a young man describes his path to diagnosis and wellness. See the link for the full story. Another example is that of Novak Djokovic, finalist of the US Open, winner of the Davis Cup and the Australian Open and currently enjoying a 39 match winning streak. It is being reported by Tennis Connected that Djokvic attributes his success to the gluten free diet, however, he was successful before the diagnosis and diet change.

    Many will debate the facts and findings, emotions and opinions, I pray for the health and safety of all those in search of a diagnosis for celiac and other illnesses. The gluten free diet has absolutely had a positive impact in my life.

    Monday, May 30, 2011

    Kate's Buttercream Frosting

    Kate's Buttercream Frosting (dyed orange for a special day)
    This post is dedicated to my friend Kate. She has made my life sweeter in so many ways. We have laughed, we have cried and what friendship would be complete without sharing recipes. Without further ado...

    Recipe tip: I use between  4-6 tablespoons whipping cream. Use 2 and add only if necessary. I also use approx. 4 cups powdered sugar. This frosting is so versatile. Play around with the consistency. You can frost cupcakes, cakes, brownies, decorate with it, or just simply (I mean sinfully) eat it straight from the bowl. Makes 3 sinful cups.

    Kate's Buttercream Frosting
    One stick butter, softened
    2 tablespoons whipping cream
    1 teaspoon almond extract
    1 teaspoon vanilla extract
    1 bag powdered sugar


    Whip butter with cream. Add almond and vanilla extracts. Blend for 5 minutes. SLOWLY add powdered sugar one 1/4 cup at a time.

    Vegan Chocolate Cupcakes with Mocha Frosting: How Sweet It Is

    Vegan Chocolate Cupcakes (naked with no frosting)

    Since being given 1,000 Gluten Free Recipes by Carol Fenster, Ph.D., I knew I wanted to share recipes with others who require a gluten free diet or who simply appreciate delicious food. It is with great pleasure that I share this next sweet treat reprinted with permission from the publisher, 1,000 Gluten Free Recipes by Carol Fenster; Wiley, 2008. Only one thing could make the timing of this post even sweeter for me and that is that this week marks the 3 year anniversary of going gluten free for my son and myself.

    Recipe tip: I make these cupcakes in regular sized muffin cups with good results. I have not perfected the number of servings due to varied amounts per cup. The picture above shows the cupcakes well, naked with no frosting. I highly recommend trying Carols' Mocha Frosting and my friend Kate's Buttercream Frosting. See Dessert and Frosting labels for Kate's Buttercream Frosting Recipe.

    Vegan Chocolate Cupcakes with Mocha Frosting
    Makes 24 servings
    These simple chocolate cupcakes are perfect for those who avoid dairy and eggs. Coffee enhances the chocolate flavor in the frosting. 


    Cupcakes
    1 1/3 cups Carol's Sorghum Blend (see recipe below)
    1 cup sugar
    1/3 cup unsweetened cocoa powder (not Dutch process or alkali)
    1 teaspoon baking soda
    3/4 teaspoon xanthum gum
    3/4 teaspoon salt
    1 cup (120 degrees) hot water
    1/3 cup canola oil
    1 tablespoon cider vinegar
    1 tablespoon pure vanilla extract
    Frosting
    2 cups powdered sugar
    2 tablespoons unsweetened cocoa powder
    2 tablespoons unsalted butter or buttery spread, such as Earth Balance, at room temperature or canola oil
    1/4 cup hot (120 degrees Farenheit) strongly brewed espresso or coffee
    Pinch of salt

    1. Place a rack in the middle of the oven. Preheat the oven to 350 degrees Fahrenheit . Generously grease the cups of a mini 12 cup non-stick (gray, not black) muffin pan or line with paper liners. Spray the insides of the liners with cooking spray.

    2. Make the cupcakes: Whisk together the sorghum blend, , sugar, cocoa, baking soda, xanthum gum, and salt in a medium mixing bowl. Add the water, oil, vinegar, and vanilla extract. Beat with an electric mixer on low speed until thoroughly blended. Divide the batter evenly in the pan. Let the batter stand 10 minutes.

    3. Bake 15 to 17 minutes or until a toothpick inserted in the center come out clean. Cool the cupcakes in the pan for 5 minutes and then place them on a serving platter or desert plates. Repeat with remaining batter.

    4. Make the frosting: In a medium bowl, beat all ingredients except coffee with an electric mixer on low speed until blended. Add coffee gradually until frosting reaches desired consistency. Spread each cupcake with frosting. Serve immediately.

    Carol's Sorghum Blend
    1 1/2 cups sorghum flour
    1 1/2 cups potato starch/corn starch
    1 cup tapioca flour
    Whisk the ingredients together until well blended. Store, tightly covered in a cool dark , dry place. You may refrigerate or freeze the blend, but bring to room temperature before using. Makes 4 cups. You may double or triple the recipe.

    Many thanks to Ms. Fenster for allowing me to share this recipe with you dear reader. I hope you have many lasting memories from making it and enjoying it with those you love.

    Wednesday, May 18, 2011

    In a Word...Pizza: A Tribute to Carol Fenster, Ph.D.

    First Homemade Gluten Free Pizza

     This post is dedicated to Carol Fenster, Ph.D., internationally recognized expert on gluten free cooking. Thank you Ms. Fenster, you have made my families' Friday nights delicious once more! 


    Allow me to set the scene, five years ago I was happily making homemade pizza crust every Friday while listening to my son practice the piano. Fast forward two years and 208 pizzas later, my son and I are diagnosed with celiac disease. BAM, it was as if the wind had been knocked out of me.

    I spent a long time in a celiac haze not knowing which way to turn. During this period of time I received 1,000 Gluten Free Recipes, by Carol Fenster, Ph.D.  It was the biggest cookbook I had ever seen. With one glance it was clear that Ms. Fenster had spent a lot of time creating this treasure trove.

    Wanting desperately to begin making pizzas again on Fridays, I invested in the ingredients to make Carol's Sorghum Blend.  It was the first step to making homemade gluten free pizza crusts.

    Recipe Tips: I order a case of each of the following: Bob's Red Mill brand sweet white sorghum flour, potato starch and tapioca flour and triple the recipe right away because I make and use Carol's Blend so frequently.  By purchasing in bulk, I believe the cost savings is beneficial not to mention I am less apt to run out of one of the ingredients. Personally, I prefer potato starch over corn starch for this blend.

    "From 1,000 Gluten Free Recipes by Carol Fenster; Wiley, 2008; reprinted with permission from the publisher"

    Carol's Sorghum Blend
    1 1/2 cups sorghum flour
    1 1/2 cups potato starch/corn starch
    1 cup tapioca flour
    Whisk the ingredients together until well blended. Store, tightly covered in a cool dark , dry place. You may refrigerate or freeze the blend, but bring to room temperature before using. Makes 4 cups. You may double or triple the recipe.
    Homemade Pizza Crust Recipe Tips: I have used 2% cow's milk with success. I usually skip adding seasoning and onion powder to the dough and season the par baked crust (see More Tips below for topping suggestions) While waiting for the sugar and yeast to dissolve in the milk I blend the other dry ingredients with a whisk in my Kitchenaid mixing bowl. I have also used Millet flour for dusting with tasty results. I have always doubled the recipe with much success. Why have one pizza, when you can have two!?

    "From 1,000 Gluten Free Recipes by Carol Fenster; Wiley, 2008; reprinted with permission from the publisher"

    Homemade Pizza Crust
    1 tablespoon active dry yeast
    2 1/2 teaspoons sugar
    2/3 cup warm 1%milk (cow's, rice, soy, potato or nut)
    2/3 cup potato starch
    1/2 cup  Carol's Sorghum Blend
    2 teaspoons xanthum gum
    1 teaspoon Italian seasoning
    1 teaspoon onion powder 
    3/4 teaspoon salt
    1 tablespoon olive oil
    2 teaspoons cider vinegar
    Shortening for greasing the pan, such as Spectrum Vegetable
    White rice flour for dusting
    1. In a small bowl, dissolve yeast and sugar in warm milk. Set aside to foam for 5 minutes. In a food processor, blend yeast mixture, potato starch, sorghum blend, xanthum gun, Italian seasoning, onion powder, salt, oil, and vinegar, until ball forms. Dough will be very soft. 
    2. Generously grease a 12 inch non-stick (grat, not black) pizza pan with shortening. Do not use cooking spray-it will make it harder to shape the dough. Place dough on prepared pan. Liberally dust with white rice flour; then press dough into pan with your hands, continuing to dust dough with flour to prevent sticking as needed. The smoother the dough, the smoother the baked crust will be. Makes edges thicker to contain toppings.
    3.Place rack in the bottom position of the oven for the pre-baking and another in the middle position for the secondary baking. Preheat the oven to 425 degrees Fahrenheit. 
    4. Bake pizza crust for 10 minutes on the bottom rack, until crust begins to brown on the bottom. Remove from the oven. The crust is now ready to be used as per your recipe.

    More tips: Ms. Fenster recommends removing the pizza from the oven and letting it rest for 5 minutes. Also, brushing the crust with olive oil before cutting and serving. If I am making a white pizza I choose from a variety if toppings such as olive oil and minced garlic, and a combination of mozzarella and provolone. Now for a more traditional pizza, Don Pepino pizza sauce is the best. I have enjoyed Don Pepino since I was a little girl, and I appreciate it even more today since they proudly print "Gluten Free" on the label. Don't forget the pepperoni, I never do!

    Monday, April 25, 2011

    In the Lap of Gluten Free Luxury


    The title of this post came to me while in Florida visiting family this past week. I could write about the white sugary sand beaches, the tropical green waters of the Gulf of Mexico and go on and on about the fun we had fishing on a fantastic charter boat, but all I really want to write about is FOOD! I spent five days in what can only be described as the lap of gluten free luxury. When traveling, things become unknown as far as food options unless you do your homework. I admit I did not give food a lot of thought before going to Florida. To me, Florida meant fresh fish, fruit and vegetables, all gluten free options. I really did not consider a whole pantry full of gluten free packaged goods. But that is exactly what I found when we arrived.

    I felt as if I had been gently dropped onto my own personal gluten free island. Brownies, crackers, chocolate wafers oh my! There were so many options I had to bring some home before even trying them. My favorite products were Sam Mills Gluten Free Corn Pasta, and Glutino Sans Gluten Free Wafer Cookies.


    Sam Mills Gluten Free Corn Pasta came as such a surprise to me. I had always been told when buying gluten free pasta to buy a rice variety. I have had success with rice brands, but Sam Mills has made me a believer that rice has some competition. There were seven people at our dinner table, only two follow a gluten free diet. Everyone loved the pasta. In fact the hostess (who is not on a gluten free diet) said she will buy Sam Mills from now on. The texture and taste cannot be beat. Best of all No Sticking!

    Glutino never ceases to amaze. People who complain that gluten free food is bland with no flavor haven't had anything from Glutino. They make pretzels, crackers, cookies, wafers, bread and much much more. Today, I am writing about the Milk Chocolate Coated Wafers. Crispy wafers layered with chcocolate and deliciously dipped in yes, more chocolate. In appearance they remind me of something I ate as a child, but in taste they are so grown up. I see these gems on a dessert platter at a cocktail party or yes at your five year old's birthday bash!

    P.S. The fish, fruit and vegetables were just as I thought, plentiful and mouthwatering. Many thanks to my family and to Florida for the southern hospitality I could get used to :)

    Saturday, April 2, 2011

    Beef and Broccoli


    Recently I had such a craving for beef and broccoli I could hardly stand it. This craving went on for a few days. I could not get out to P.F.Changs China Bistro so I went to the net. I Googled Gluten Free Beef and Broccoli and this is what I found. Gluten Free Betty's Beef and Broccoli  Right after making and eating this phenomenal version of this famous dish I posted a comment and requested that I post it here for you dear reader.

    Recipe tip: I used peanut oil instead of olive oil. I was running low on olive oil and needed it for another recipe. I also used fresh broccoli. Betty's tip for partially thawing the steak is right on!
    Gluten Free Betty's Gluten Free Beef and Broccoli

    1 pound beef steak
    1/4 cup gluten free soy sauce
    3 Tablespoons brown sugar
    2 Tablespoons cornstarch
    1 1/4 cup cold water
    16 ounces frozen broccoli florets
    2 Tablespoons olive oil
    2 cloves minced garlic
    2 teaspoons sesame oil (this is the secret to make it taste like it came from a fabulous restaurant)

    Combine soy sauce, sugar, corn starch, and water in a small bowl and set aside.   Cut steak against the grain into thin strips about 1/4 inch thick.  I find it's easiest to cut the steak when it's frozen (thaw it for 30 minutes so that it's not rock solid).  Heat a large skillet to medium high.  Put the olive oil and steak in the skillet and cook both sides until brown, about 4-5 minutes.  Steam broccoli in the microwave or in a steamer while steak is cooking.  When the steak is brown, add the garlic and cook for 1 minute.  Pour the soy sauce mixture over the meat and cook until it begins to thicken.  Stir in the sesame oil.  Remove from heat, stir in the steamed broccoli and serve over rice.
    I can see myself making this on a regular basis. I also see myself entertaining with this dish. Enjoy!
    Thank you, thank you Gluten Free Betty

    Sunday, March 13, 2011

    Nosh & Enjoy Life

    I must admit since being diagnosed with celiac disease I bake and cook more at home. Not just out of necessity, but taste too. My family and I really enjoy homemade food. That being said, I also enjoy the convenience of packaged goods especially when they taste oh so good.

    Recently I joined a book club and everyone knows that book clubs usually share more than an interest in literary works, they share food. I like to bring snacks, yes so that I know there is something I can nosh that is safe, but I enjoy introducing gluten free foods to folks who may not know how delicious they can be.

    That brings me to Enjoy Life Foods . To date, I have only had snack bars and cookies, but what I have had leaves me wanting to try more. For example the No-oats Oatmeal cookies and the Snickerdoodle cookies, yum! At the meeting of my last book club a friend brought the brownie cookies. Right away I noticed a significant change for the better. The brownies are now called "Soft Baked" Double Chocolate. Wow, what a difference! They are soft and moist. I have not had the Snickerdoodle or No-oats Oatmeal variety since the improvements, but I want to.
    RECIPE TIP:
    These cookies are delicious as is, but if you want to take them to the next level. Smear a generous tablespoon of your favorite frosting onto one of the cookies and then sandwich them by placing another cookie on the frosting. Oooo la la! (pictured above)

    Not only have a friend and I brought these Enjoy Life "sandwiches" to book club; I have also sent them into my son's classroom as a treat. There is always someone who does not require a gluten free diet inquiring how to get a hold of these cookies.

    I have spent so much time writing about the cookies I haven't mentioned the snack bar variety: Caramel Apple, Cocoa Loco, Sunbutter Crunch, and Very Berry. I recommend you try them all. Sunbutter Crunch is my favorite.

    Enjoy Life Foods prints "Eat Freely" on their packaging and that is exactly what they have helped us to do. Congratulations Enjoy Life, you are now listed under the Top 20 products on Gluten Free and You. For those who don't know this label indicates my top 20 favorite gluten free products and/or brands. If I were diagnosed today these are the foods I would want to know about.

    Crock-pot Pork with Cabbage

    Well, it's not corned beef but this is what my family will be having this Saint Patrick's Day. Juicy pork shoulder roast, red cabbage sweetened with a kiss of brown sugar and a side of mashed potatoes. It brings me such joy when I find a recipe that is already gluten free. Don't get me wrong I love tweaking recipes to make them gluten free. However, when I find a recipe that is gluten free to begin with it reminds me of the many, many foods that have always been and will always will be gluten free. Too Shakespearean, sorry!

    Crock-pot Pork with Cabbage offered by Linda Larsen on About.com

    4 cups red cabbage, shredded
    1 onion, chopped
    1/2 cup brown sugar
    1/2 cup apple cider vinegar
    1/2 tsp. salt
    1/4 tsp. pepper
    3lb. boneless pork shoulder roast

    1. Combine cabbage, onion, brown sugar and vinegar in your crock-pot.
    2. Season roast with salt and pepper and brown on all sides in a large skillet for approx. 5 minutes.
    3. Place pork in crock-pot and cook on low for 7-8 hours until the pork heats to 160 degrees. Serves 6.

    If you don't love this recipe I will be very surprised. I thank Linda Larsen for sharing this recipe on About.com since it has become a family favorite. Enjoy!

    Tuesday, March 8, 2011

    Bon Appetit Ratatouille

    Dear Reader, I laugh about this today, but the only reason I went looking for a Ratatouille recipe was because I felt compelled to try the dish that melted the indignant heart of Food Critic Anton Ego from the animated feature film of the same name, Ratatouille. I thank my lucky stars that I found the following recipe from Whole Foods Market. I hope you enjoy it as much as I do. I won't say that my two children enjoy ratatouille the vegetable dish as much as the movie, but when I spoon a hearty helping of this onto their plates they always want an encore.

    Recipe tip: Although the Whole Foods' recipe is gluten free, if you have read any of my blogspot posts you will not be surprised to hear I have tweaked the recipe to suit  my taste and that of my family. I almost did not put green pepper into this dish, again I am thankful I did, it is subtle and delicious. If you compare the Whole Foods version and mine, you will see only a slight difference in the preparation of the vegetables.

    I dedicate this post to my mom; much like Ego this dish reminds me of my mom and all the ways she tried to disguise vegetables so that I would eat them. Although I no longer try to hide them from myself, I still enjoy her techniques for slicing and dicing. Thank you mom for helping to create a love of healthy food.

    Now on with the show...

    Ratatouille

    1 eggplant, peeled and cut into 1-inch chunks (In the past I have omitted the eggplant and increased the amount of squash with much success)
    1 1/2 teaspoons salt
    1/4 cup extra virgin olive oil
    4 cloves garlic, finely chopped
    2 tablespoons herbes de Provence
    1/4 teaspoon chile pepper flakes
    Pepper to taste
    1 green bell pepper, cored, seeded and finely chopped in the food processor
    1 large yellow onion, finely chopped in the food processor
    2 zucchini or summer squash, sliced into 1/2 inch rounds ( I like one of each for color)
    1 (28-ounce) can whole peeled tomatoes (I have blanched, peeled and roasted my own tomatoes from the garden, but jarred works great too)
    2 tablespoons balsamic vinegar

    Preheat oven to 425°F. Toss eggplant with 1 teaspoon of the salt, and set aside in a paper-towel-lined bowl while preparing the other vegetables. (If omitting the eggplant, skip this step)

    Combine remaining 1/2 teaspoon salt, oil, garlic, herbes de Provence, chile flakes and pepper in a small bowl. Put the processed bell pepper and  onions into a large bowl. Toss in the zucchini or squash and pour the oil mixture over them. Pat eggplant dry with another paper towel and toss with vegetables, coating everything thoroughly. Spread vegetables in a single layer on a baking sheet and roast, stirring once or twice, until golden and very soft, 30 to 35 minutes.

    Put tomatoes into a large bowl and break them up using your hands or a spoon. Add roasted vegetables and vinegar and stir well. Cool to room temperature before serving, or cover and refrigerate overnight. The Whole Foods recipe recommends cooling the dish to room temperature; I have eaten this dish warm, room temperature and cold, and have loved them all. Bon appetit!


    Sunday, March 6, 2011

    Steamed Shrimp


    The following recipe was taken straight off the can of Old Bay Seasoning, one of my favorites in the kitchen!

    Recipe Tips:  Shrimp are delicious alone or accompanied by a small bowl of melted butter for dipping. Although white vinegar is fine, my mother swears apple cider is best for this dish.

    2 Tbsp. Old Bay Seasoning
    1/2 cup vinegar
    1/2 cup water
    1 lb. shrimp in shells

    In saucepan, combine first 3 ingredients. Bring to a boil. Add shrimp, stir gently. Cover; steam until tender, about 3-5 minutes. Drain, remove shells.
    Enjoy!

    Baby Field Greens Tossed with Portobello Mushrooms


    1 -2 package(s) baby portobellos, washed and dried
    3-4 Tablespoons basting oil with herbs
    1-2 handfuls of field greens per person
    Newman's Own  Light Balsamic
    salt and pepper
    shredded Parmesan (optional)


    Recipe Tip: I used field greens in this recipe, but please use whatever you like. Baby spinach is also delicious.

    Preheat oven to 450 degrees. Slice mushrooms into desired size. Coat mushrooms with basting oil in a large bowl.  Place mushrooms on a baking sheet, salt and pepper mushrooms and roast for 12-15 minutes. While mushrooms are roasting wash and dry your greens. Once mushrooms are finished toss mushrooms and field greens together. Drizzle Newman's Own Light Balsamic to taste. Sprinkle parmesan if desired. Salad may be served warm or room temperature. Enjoy.

    More Salmon Patties, Please!


    "More Salmon patties, please",  is the phrase you will hear when you have served this delicious meal. I use two cans of Salmon when I make this dish because if you have leftovers they don't hang around for long.

     Recipe tip: I have used McCormick Salmon Grill Mates for the seasoning, but lately cannot find this product. I recently saw a product called Chef Paul Prudhomme's Magic Salmon Seasoning which may be just as good, but I have not yet verified it as gluten free. For your safety verify all ingredients as gluten free when following a strict gluten free diet.

    Salmon Patties
    2 (14.75oz.) cans Salmon, cartilage removed
    1 cup Hellman's Mayonnaise
    1 Tbsp. Salmon seasoning 
    1 Tbsp. Leah & Perrins Worcestershire Sauce (Gluten Free on the label, YAY!)
    1 cup bread crumbs (I process unused portions of Pamela's Bread, I make in my bread machine)
    2 Tbsp. Canola Oil

    1. Flake Salmon with a fork or fingers in a large bowl.
    2. Combine remaining ingredients with Salmon.
    3. Shape into patties on a plate, cover with plastic wrap and  place in refrigerator for a minimum of two hours or overnight. This minimizes breakage when frying.
    4. Heat oil in pan to med-high heat. Fry patties for 5-7 minutes until lightly browned gently flipping halfway through cooking time.
    5. Drain on paper towels. Serve.
    Enjoy!

    Makes a lot depending on how large your patties are. Experiment, have fun!

    Sunday, February 20, 2011

    Corn Fritters

    I love corn fritters!  Oddly, I never made them before my celiac diagnose 2 1/2 years ago. Having celiac disease certainly has been bittersweet. On one hand there are a lot of foods I can no longer eat, but as I said in a post last year, "I no longer eat, I taste!" What could be better than that? OK, back to the recipe. I originally found this little gem on All Recipes. It was offered by Joan Zaffery. She adds, "Nothing warms up a cool night like a plateful of old-time corn fritters!" Although I agree with Joan, I will add they are fantastic anytime of year.

    Recipe tip:  To make these fritters gluten free I use Pamela's Baking and Pancake Mix in place of the sifted all-purpose flour. I also use thawed frozen corn I saved from the previous summer. YUM!

    Corn Fritters 
    3 cups oil for frying
    1 cup Pamela's Baking and Pancake Mix
    1 teaspoon baking powder
    1/2 tsp salt
    1/4 tsp white sugar
    1 egg, slightly beaten
    1/2 cup milk
     1 Tbs shortening, melted
     1 (12oz.) can whole kernel corn, drained

    1. Heat oil in a heavy pot to 365 degrees.
    2. In a medium bowl, combine Pamela's Baking Mix, baking powder, salt and sugar. Beat together egg, milk,  melted shortening and stir into baking mixture. Stir in the corn kernels.
     3. Drop fritter batter by the spoonfuls into the hot oil and fry until golden brown, flipping once if necessary. Drain on paper towels. Enjoy!

    Yields approx 12 fritters.

    I almost forgot, my husband loves these fritters served with jelly or jam. At first, I wasn't so sure, but trying the fritters dipped in a little homemade peach freezer jelly made me a believer. Thanks honey!

    Thursday, February 10, 2011

    Jack Mackerel Cakes


    I dedicate this post to my oldest son. If it were not for him I would have never discovered how much I love this dish. He is an avid fisherman and is quite knowledgeable about fish, their habitats, fishing and now recipes. This recipe originally began as Salmon Cakes, but thanks to him is now made even more reasonably priced with the use of Jack Mackerel. I will post a similar salmon recipe at a later time.

    Recipe tip: I love McCormick's Salmon Spice, but I will often change what I use either because I cannot get the Salmon Spice or simply because I like to experiment with flavors and spices. I have also used McCormick Garlic and Onion. Today I am using Old Bay Garlic and Herb Seasoning.

    Jack Mackerel Cakes
    1 15oz. can jack mackerel, drained and spinal column removed
    1 egg
    1tsp. McCormick Salmon Spice (see recipe tip for substitution)
    1 cup stone ground cornmeal
    1/4 cup Hellman's mayonnaise (gluten free is written on the label, yay!)
    canola oil for frying

    1. Place mackerel in a bowl, break large pieces apart so that it combines well with the other ingredients.
    2. Place egg, spice, cornmeal and mayonnaise in the bowl with the mackerel, stir thoroughly to combine.
    3. Take a heaping tablespoon of mixture and shape into cakes. Place on a plate and cover with plastic wrap.
    4. Refrigerate for at least 2 hours; even overnight. This step is very important so the cakes do not fall apart.
    5. Heat enough oil in a pan to fry the cakes. Gently place a few cakes in the pan at a time. Fry until golden brown, turn and fry the opposite side in the same way.  Place on a plate with paper toweling. Serve and ENJOY!

    Makes 12-15 cakes

    Saturday, January 29, 2011

    Spiced Meatballs


    My aunt gave this recipe to me years and years ago and I dedicate this post to her. The only change I had to make to it was to use gluten free bread crumbs. Delicious doesn't even begin to cover it. There are many ingredients each vital to the magnificent results. These meatballs are a crowd pleaser but you might just want to keep a few for yourself for later. I make these meatballs primarily for special occasions including Christmas Eve, New Year's Eve, birthdays, Superbowl parties, etc...

    Meatballs
    1 lb. ground beef (ground chuck works well)
    2 eggs well beaten
    3/4 cup gluten free bread crumbs (I have used Pamela's bread machine bread and Schar premade crumbs)
    2 tbsp. finely chopped onion
    1/2 tsp. salt
    1/2 tsp. prepared horseradish
    1/4 tsp. pepper
    1/8 tsp. hot sauce

    Sauce
    2-3 Tbsp. butter
    1/2 cup ketchup
     1/2 cup chili sauce
    1/3 cup firmly packed brown sugar
    3 Tbsp. cider vinegar
    2 Tbsp. finely chopped onion
    1Tbsp. Worcestershire sauce
    1/2 tsp. dry mustard
    1/4 tsp. pepper
    4 drops hot sauce

    Garnish
    chopped green onion (optional)

    Combine first eight (Meatball) ingredients, mix well and shape into 1" balls. Saute meatballs in butter until browned, drain on paper towels, set aside.
     Combine Sauce ingredients in a large sauce pan; bring to a boil. Reduce heat and simmer 5 minutes. Add meatballs and simmer for an additional 10 minutes.  Garnish with chopped green onions.
    Keep meatballs warm in a chaffing dish if you have one. I don't have one, but have never had any problem just putting them in a serving bowl. Enjoy!

    Yields 36 meatballs.